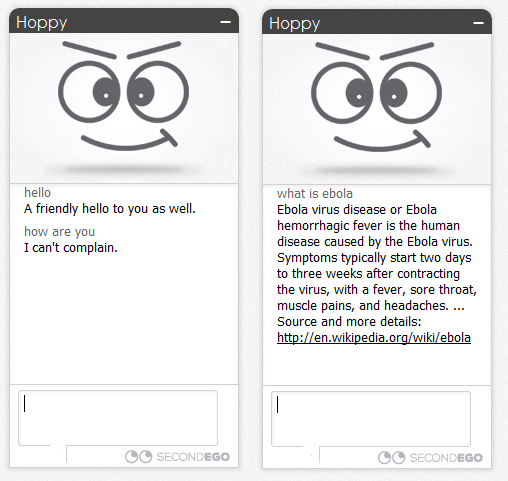
Chatbot (also known as virtual agent) is a program which simulate intelligent conversations with human. The primary reason for using a chatbot is reducing support costs in businesses (customer sevice, helpdesk, artificial intelligence), but it can be fun also, if you will create one for your website. Chatbot with knowledge management is the primary key to improve your website. In this case, it can drastically raise number of visitors on your website. And this counts today.
Some months ago, I discovered a really powerful platform for creating and managing chatbots. You can find it on SecondEGO. I have a talk with developers and you can believe me, that platform has many things to offer. Maybe you don’t see or understand all features, but believe me, there is a whole world of interesting things. Beside that, chatbots have raising trend on internet, so step on train and start with a journey.
In this article I will show you the necessary steps which should be done before your website visitors can talk to your chatbot. The procedure is simple and if you have your website, this won’t be an issue. In next articles, we will look at some features more detailed.
First of all, you have to register on page. The procedure is fast and transparent. Don’t forget to check your email to activate your SecondEGO account. Email and password will be necessary, when you will log in next time.
Immediately after activation, the welcome message on dashboard appears. Use “Create a new Virtual Agent” button to start a wizard which will run you throw basic steps.
In first step (Design tab) you have to name your chatbot. I suggest you to use a name that means something, because if you will create more chatbots in the feature, you can distinguish it from other.
Press “Next” button at the right bottom of the wizard to continue.
Knowledge tab offers you to select predefined knowledge modules. Knowledge module contain some learnings from different areas. Example: if you select Wikipedia knowledge module, your chatbot will be able to answer on question like “what is ebola”. Another example: if you select Chat module, your chatbot will be able to answer on question like “how are you” and similar.
This is excellent learning starting point for your chatbot. It will be usable without your special training. At least for some basic talks.
After you selected knowledge modules, press “Next” button at the right bottom to continue.
Package tab offers you to select package. For the purpose of this article, we will choose Free package.
Don’t forget to press “Create Virtual Agent” button.
Dashboard with open Status tab occurs on your display.
It says that your chatbot (Virtual Agent) isn’t visible on your website yet. It is understandable because your website don’t have any information about it. You have to add some lines of HTML code into your website. To do that, open Embed code tab and select/copy SecondEGO embed code script.
Paste selected into your website HTML source (usually index.html) and save the file. My recommendation is that this code should be just before </body> tag.
Why? Your chatbot will be loaded latest on your website. So there won’t be any changes on your website in the meaning of speed. And if something goes wrong with chatbot, your website will work as before.
Now (re)load your website in browser. Congratulations – your first chatbot is now online!!
Next time, we will look more detailed at some features on SecondEGO platform. It really has quite a lot to offer.
